{Hannah} Holey Dress

If you haven’t figured it out, I like to shop secondhand, which means ending up with less than perfect items. I found this dress at Goodwill, but it wasn’t until I got home that I noticed it had quite a few tiny holes.

I wasn’t able to darn the holes like I’ve done before, since the fabric is a silk wool blend, and the knit is very fine. I googled around, and came upon this tutorial, which seemed like the perfect fit for me!

I picked up some Stitch Witchery and fusible interfacing from Michaels, and got out my iron and ironing board.  I also cut a piece of parchment paper to prevent the Stitch Witchery from sticking to the ironing board and got a light dishtowel to act as the pressing cloth.

I set the iron on the wool setting with steam, and got to work on the three holes I had originally found.  It went by pretty quickly!

I got into a groove with cutting and pressing, and wound up with over ten spots that got fixed.

With all the warm weather we’ve been having recently, I can’t wait for spring so I can finally wear this dress!

{Hannah} Unrevealing

Sometimes I buy a dress that I love, but the neckline is a little too revealing. Luckily, if the fabric has a little give, and there’s a bit of extra space in the bust, it’s easy to sew the neckline up to be less revealing!

Enter: fancy designer dress from eBay. The neckline was too low for my comfort (especially on a dress that is otherwise work appropriate).

A few minutes with a needle and some thread, and I had very carefully stitched the neckline closed a few inches. Revealing no more!

I had also done this a few months ago on a dress I wore to a cousin’s wedding. I had worn it in all its low-cut glory to a friends’ wedding a few months before, but I wasn’t very comfortable then and knew I wouldn’t be in front of family either.

It’s a quick and easy fix to make your clothes work for you!

{Hannah} Silly Shirt

My friend’s bachelorette party was almost two months ago, and one of our favors was a decal to put on a shirt. I thought it would be cool (and a little silly) to wear it to the brunch after the wedding! I’ve seen shirts get iron-ons before, but I also looked it up on Google just to make sure I had the process down. I had a white shirt from Target that’s been sitting in my drawer unworn, and this seemed to be the perfect use for it.

I figured out where I wanted the decal to be placed, and got started laying everything out on the ironing board.

Then it was just back and forth, back and forth, rubbing it in with some force, and leaving the iron to do its job. I alternated between the cotton and linen settings, since it wasn’t seeming to stick well to the shirt.

Eventually the paper started to burn and I got impatient. I had been checking how it was coming along, and decided that I could claim it was a “vintage” look if the decal didn’t completely transfer. I pulled the decal up carefully, reheating some areas as necessary. Once the backing was up, I decided to heat-set it, grabbed a new sheet of parchment paper, and ironed the decal again.

However, the decal was very stiff, and had completely transferred in a few places which looked weird. I’d read that you can make things appear older by using sand paper, so I broke out my sanding block to try!

I’m not sure how well it worked, but it seemed to help a little bit.

And now here we are, and I’m wearing the shirt to their post-wedding brunch this morning. Happy Wedding!

{Home} Airing My Dirty Laundry

In my first and second apartments, I had space in the closet for a laundry basket to use for dirty clothes.  But there wasn’t space in the closet in my last apartment, so dirty clothes ended up in a laundry bag under my dresser.  I wanted something more adult for this apartment, since it’s one large room and my dirty laundry will literally be seen by everyone.

Most of the laundry hampers I saw did not interest me at all, so I was excited to see this West Elm hamper listed on Craigslist.

laundry hamper west elm twig

Even though the woven vines conceal a lot, I wanted an additional bag on the inside to cover everything and make doing laundry in my building’s basement easier.  Off I went to Bed Bath and Beyond with a 20% coupon, and I came away with this hamper.

It’s a perfect fit!

I bought a can of gold spray paint to turn it gold, but I’m still liking the dark brown.  I can always glitz it up later if I change my mind!

{Hannah} Darn It!

A few years ago, I was at a consignment shop and fell in love with a Diane von Furstenberg wool wrap dress.  As I was admiring it, I noticed a few small holes throughout the dress.  Not wanting to leave it behind, I negotiated an extra 10% discount, figuring I could try my hand at mending the holes.  And I did!

Fast forward a few years, and I regularly buy wool items with holes in them, knowing that darning small holes is fairly easy and unnoticeable.

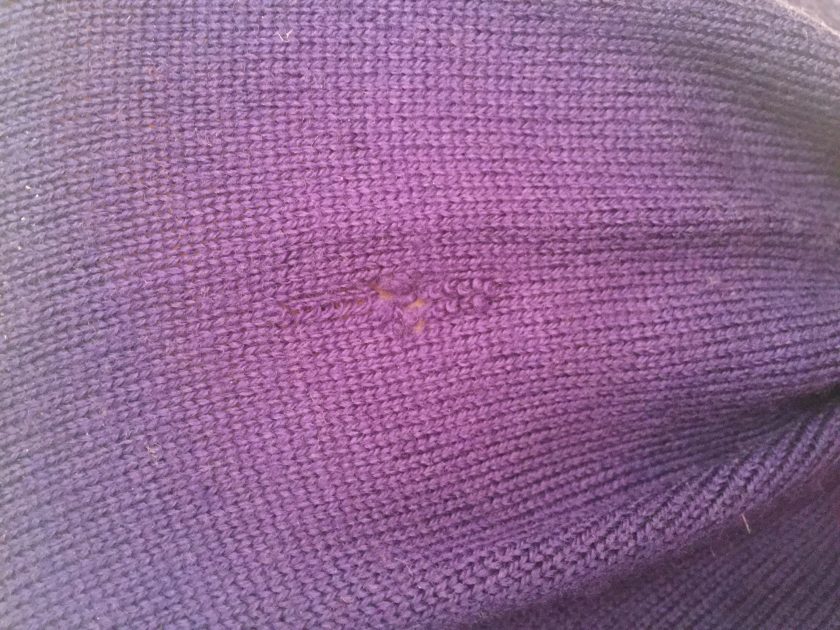
I recently bought a sweater dress from Goodwill, and didn’t notice a hole in the sleeve until I got home.  The previous owner had repaired it with some scotch tape!  That’s not good enough for me, so I broke out a needle and thread and got to darning the hole.

img_7629

There are a lot of darning techniques, and everyone seems to put their own spin on it.  Most tutorials say to work from the inside of the garment, but I prefer the outside, so I can make sure it’s coming together well.

I start with a knot on the thread on the inside, and push the needle through to the outside.  Make sure the needle isn’t so close to the hole that it could get pulled into the hole.  Then I start pushing the needle through the knit weave, working my way across the hole.

img_7631

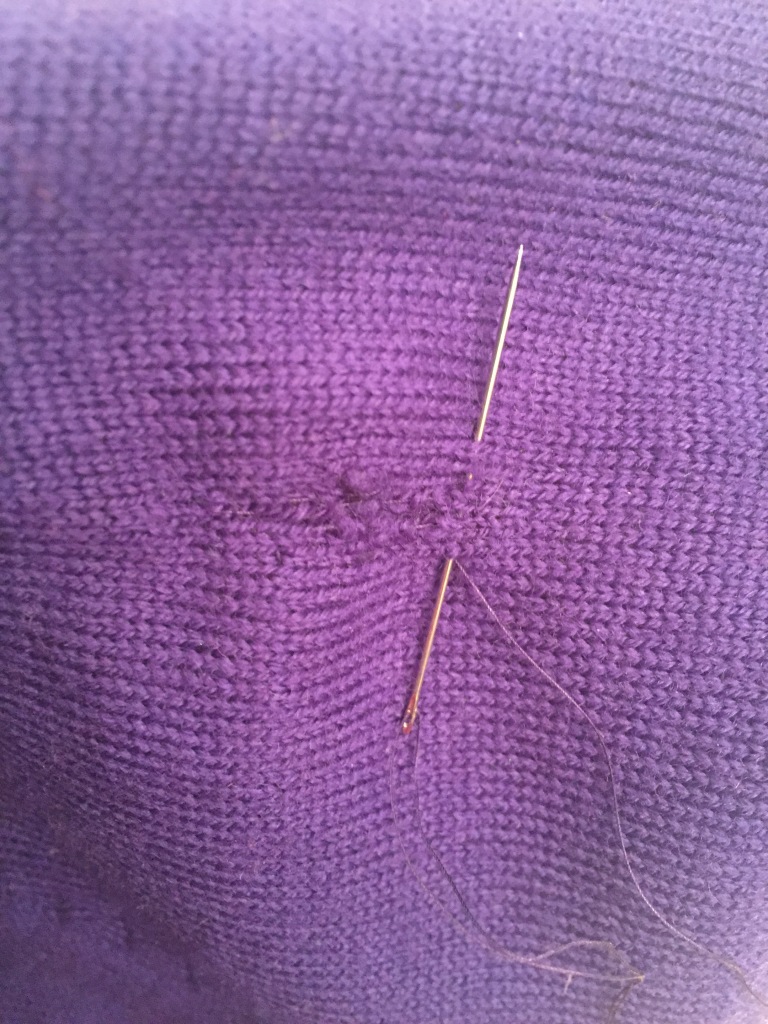
Back and forth, back and forth.  Once I’ve been across the whole hole in one direction, it’s time to go back in the perpendicular direction.

img_7630

Back and forth, back and forth, making sure to weave above and below the threads just added.

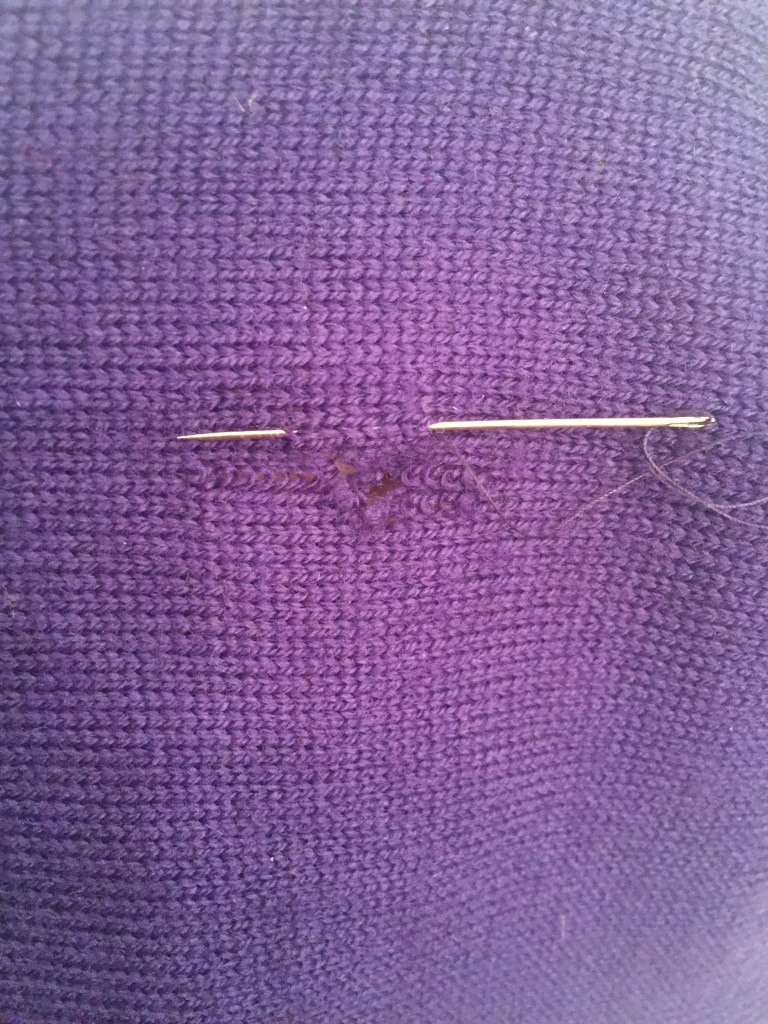
I make sure it’s tight enough to hold, but not so tight that it puts a pucker in the fabric.  I end with the thread next to the beginning end, and tie the two together a few times.

And then it’s done!

darn hole wool sew fix diy mend sweater dress

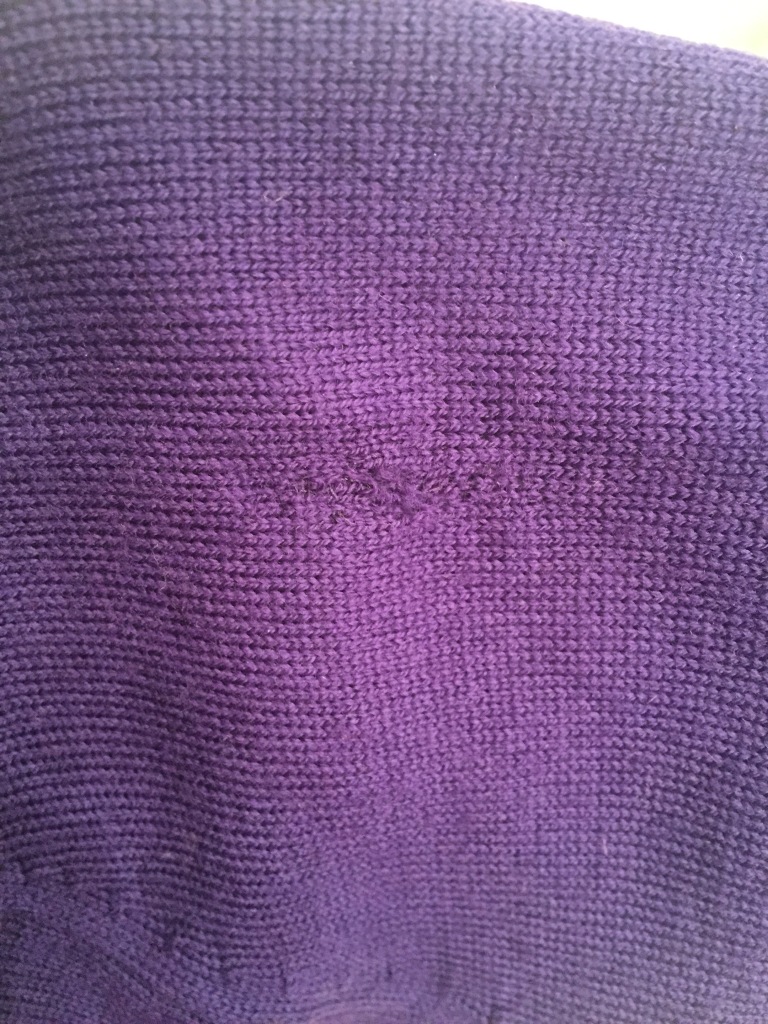
Depending on the hole size and location, some are easier to mend than others.  This hole was more of a long snag, and it still is visible if you’re looking for it.  The hole is located on the upper arm, which means it won’t be very apparent from most angles.  I bet no one would’ve even noticed if I hadn’t just shared this publicly!

PS. This dress also had some button accenting the end of the sleeves, which I removed with a small pair of scissors.  Who says that when you buy something it has to stay that way forever (I’m sensing a trend)?!